ColorChecker Passport Photo 2
... One passport. A world of colourful creative places to explore.
The art of colour management is all about getting your colours to match from input to output; meaning your camera captures true colours, your monitor displays them accurately, and your printer produces a photo that matches what you see on screen. With a combination of targets and camera calibration software, the portable ColorChecker Passport Photo 2 delivers professional quality colour control for a perfect color journey. As a first step to better colour, ColorChecker 2 can bring all your camera/lens combinations in-line with each other, so post production of files can be consistent, even across different photographic brands.
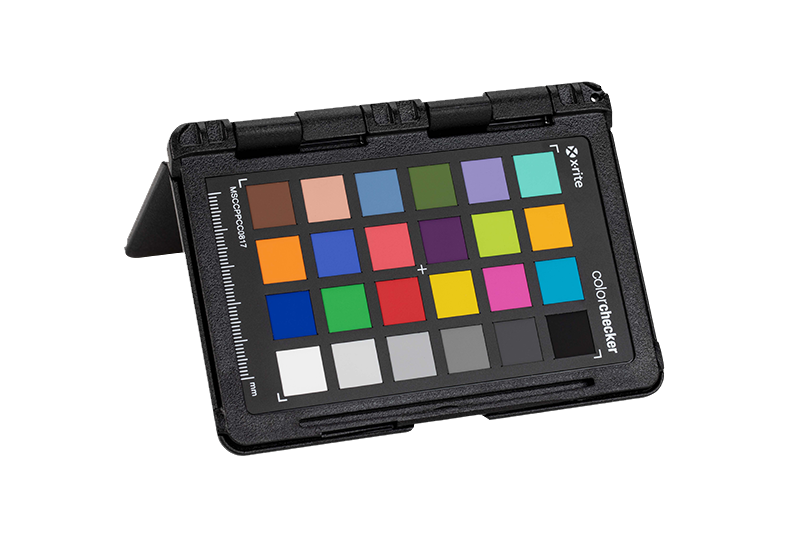
ColorChecker Passport 2 combines 4 photographic targets into one pocket size protective case that self-stands to adjust to any scene. Together with the included camera calibration software you get the ultimate in functionality, flexibility and portability.
Creative Enhancement Target - neutralise and create your look with one-click warming and cooling white balance patches; check and evaluate shadow details or highlight clipping; check and control color shifting
Classic Target - industry standard 24 Patch Classic colour reference target for creating DNG profiles with included camera calibration software and also for evaluating specific colours
Gray Balance Target - an 18% middle gray target for ensuring accurate exposures when using reflective light meters as well as for removing unwanted colour casts during post production
White Balance Target - create custom in-camera white balance for a consistent white point in a set of images, eliminating the need to correct each image later
To begin, install the ColorChecker Camera Calibration software, a plug-in is also installed for Lightroom if you haven’t done so already.
Take a photo that includes your ColorChecker Classic target, keeping it as large in the frame as possible. It doesn't even have to be in focus. Even if you're using a lens that won't close focus, it'll likely still work out OK. Try to expose properly so that there are no blinkies on your playback screen and therefore no clipping on the whites.
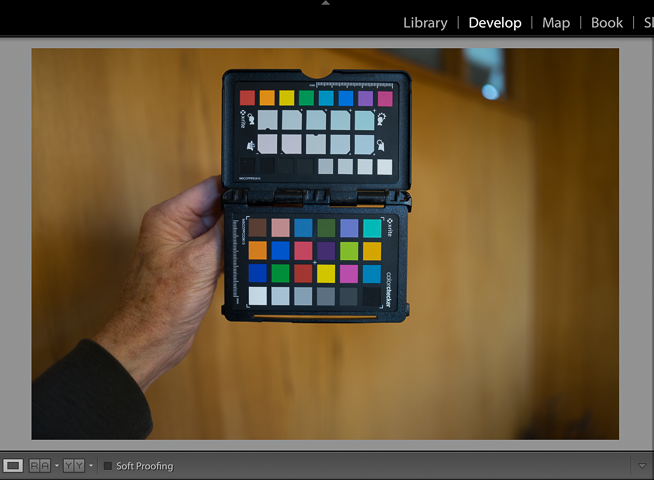
Then import the image into Lightroom
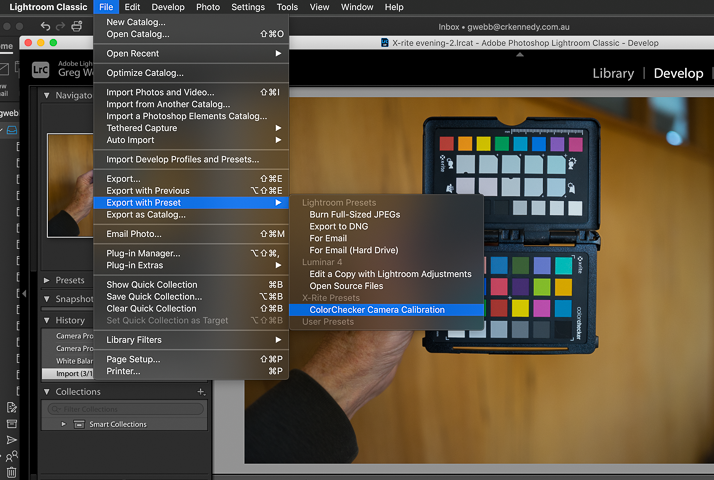
Choose File – Export with Preset – ColorChecker Camera Calibration to access the Lightroom plug-in for the Camera Calibration software. This plugin automates most of the process for making a custom camera profile.
Now choose a name for your profile. Make it as descriptive as possible. I prefer to write the camera/lens combination I’m profiling and the light source for the shoot.
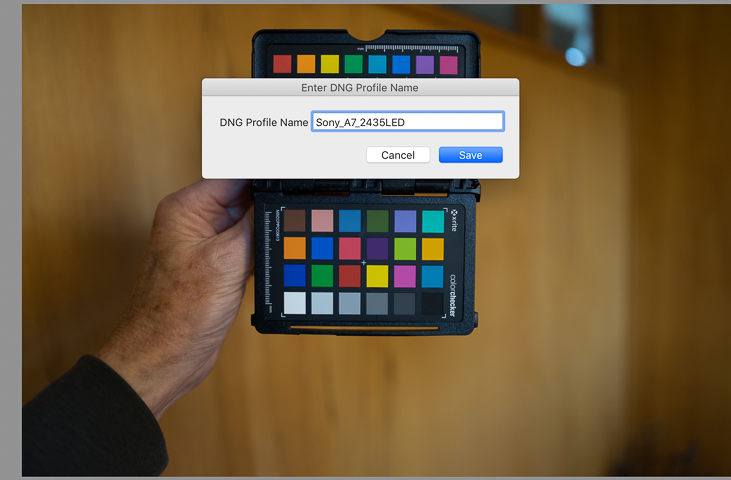
Note in the upper left-hand corner of the window a progress bar shows that the profile is being created. During this automated process, the RAW file is processed to a DNG file. Next, the ColorChecker Classic is found and the software lines up each target's 24 colors. Finally, it evaluates what the file has recorded and creates a camera profile that allows RAW files shot on the camera to display as accurately as possible, ready for processing once the camera profile is applied.
Once the profile has been created the plug-in will report that it’s finished. Next, Lightroom should be shut down and restarted. Any profile created while Lightroom is open cannot be seen until the program is restarted.
The camera profile is selectable in the Profile browser on the top of the Basic Panel within the Develop Module.
Click the drop-down menu and select Browse.
Now you can locate the Profiles drop-down.
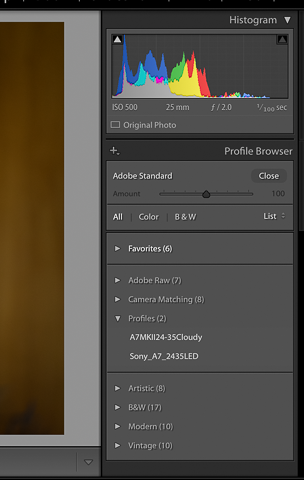
When you select the custom profile it will be applied to this Raw image.
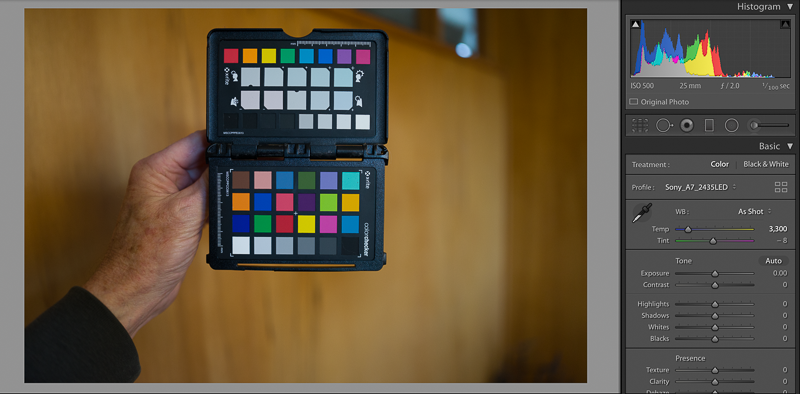
Finally, click close to return to the Develop Module. You can now use the White Balance eye-dropper on the gray scale patch second-in from the left on the bottom row, to find the the correct White Balance.
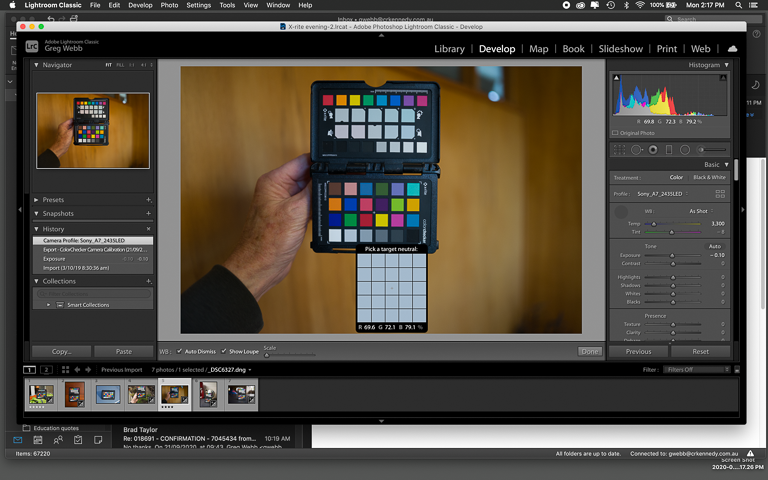
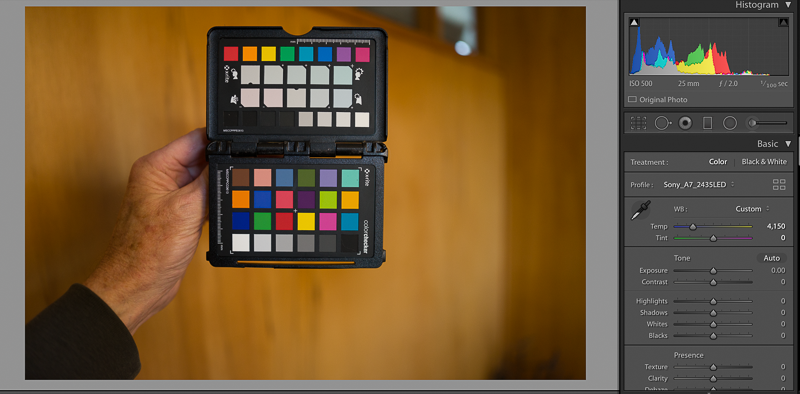
See how the colour temperature has changed to the corrected figure in the image below.
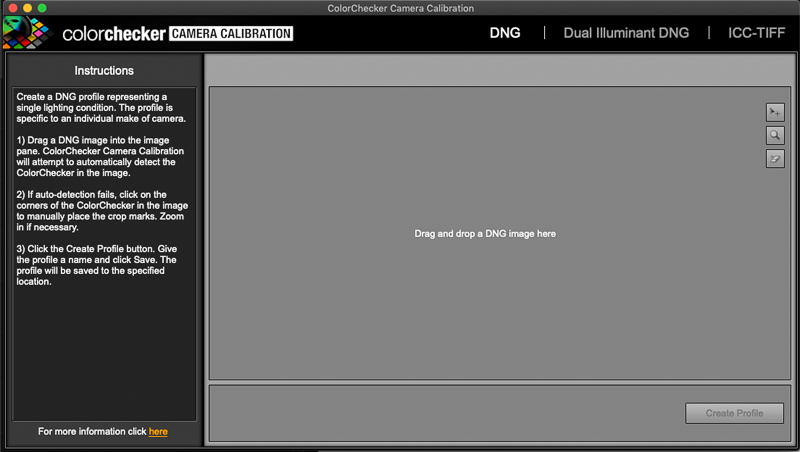
If you prefer to handle the profiling process yourself without the hidden automation, open the ColorChecker Camera Calibration software and follow these steps;
Export the shot of the Colorchecker out of either Adobe Camera Raw or Lightroom to a DNG file. Drag the file from the desktop (or wherever) into the ColorChecker Camera Calibration software and Click Create Profile, name it, and the software will find the colour patch image and begin to make a profile once you select the Create Profile button.
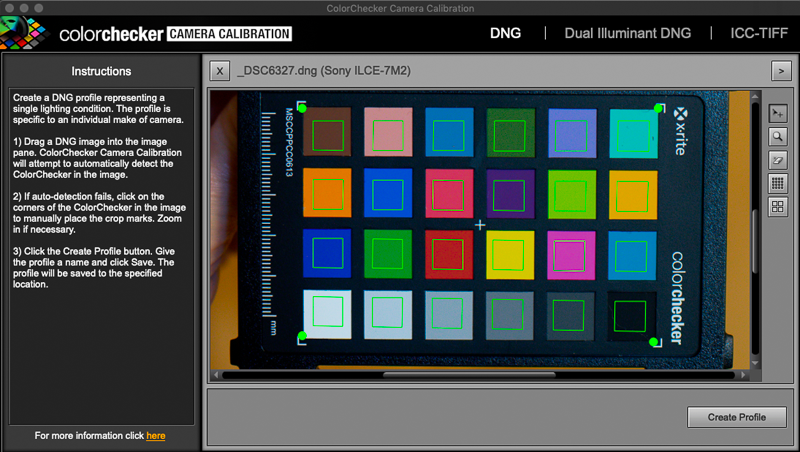
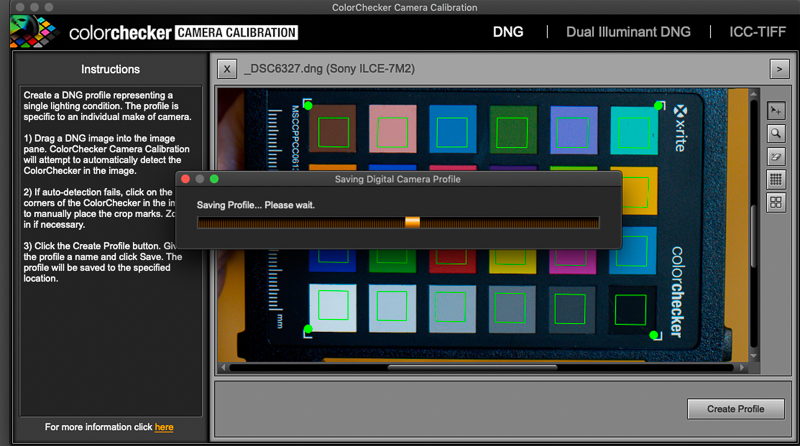
A few seconds later the job is done, with a custom profile having been created and put into the correct directory by the program.
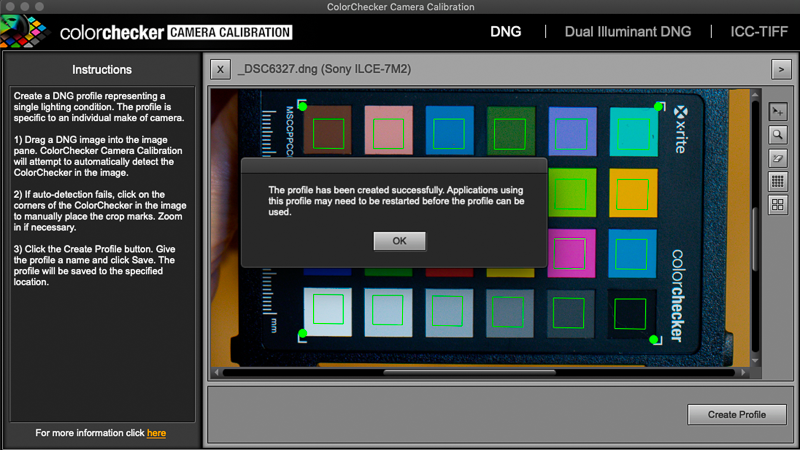
You'll have to relaunch either Adobe Camera Raw or Lightroom for the program to become aware of the profile. If you now go to the Camera Calibration tab you'll see that your named profile is now available. Select it and it's active.
You can now use the White Balance eye-dropper on the gray scale patch second-in from the left on the bottom row, to find the the correct White Balance.
That's all there is to it. You can now load any other image shot under those particular light conditions and apply this new profile, or any other for that camera that you've made. Lightroom and Adobe Camera Raw only show you profiles for the camera used to shoot the image. No others are visible, so there is no confusion or chance of mistakes.
The next trick is to create a Custom Preset in Lightroom or Adobe Camera Raw that contains both the calibration (proper profile) and the White Balance that you've set. You'll now be able to apply this to any image shot with that camera/lens combination under those light conditions, even selecting a hundred or a thousand images at once and profiling and white balancing them all with a single click. Now that's productivity.
You are of course free to create a custom profile and a white balance at any time when working on location. If, in the past, you always shot a WB card in every new lighting situation, now you can also shoot a profiling target, and in less than a minute back at the computer create a custom profile as well.
But, if you'd simply like to create a Dual Illuminant profile that is useful for just about any light condition, so that you don't need to use separate profiles, just take two separate shots of the Colorchecker, one under a warm light and another under daylight or a cool illuminant, and then drop both into the program, having selected Dual Illuminant DNG. No additional profiling is now needed for almost any light condition.
Creative Enhancement Target
On the separate panel located above the standard 24 patch Colorchecker is what X-Rite calls a Creative Enhancement Target. There are two sets of "creative" white balance patches that can be used to produce warmer and cooler images. These are the second and third rows of the patches above the colorchecker. These are particularly useful for portrait and landscape photographers. They are really good to warm up skin tones, and to produce better greens in landscapes, respectively.
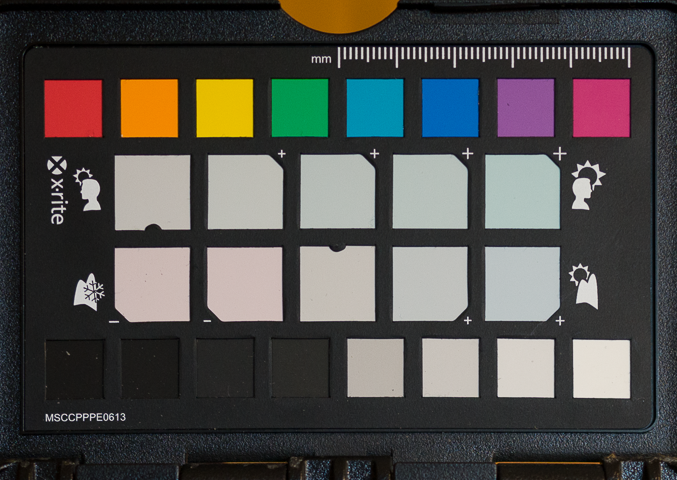
The bottom row of patches on the same page are "clipping patches". When turning on the shadow and highlight clipping warnings in Lightroom and ACR, they are extremely useful in setting the right values for the recovery sliders.
https://www.crkennedy.co.nz/products/msccpp-b/x-rite-colorchecker-passport-2
